Restoring the Beauty and Function of Sliding Sash Windows in Victorian Homes: Step-by-Step Guide
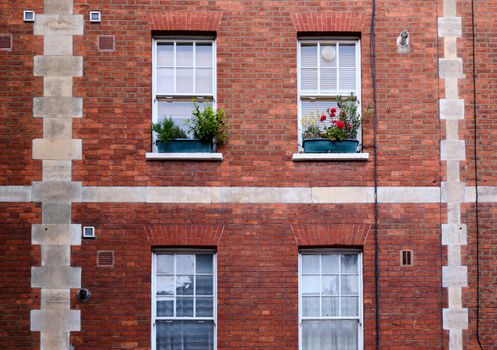
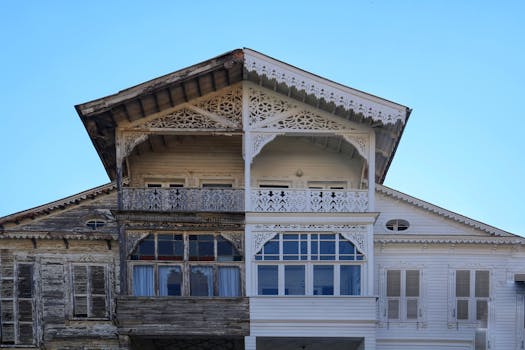
Victorian homes are treasured for their ornate architectural details, and one of the most iconic features is the sliding sash window. These elegant windows, with their characteristic vertical sliding panes, not only enhance curb appeal but also tell a story of craftsmanship from a bygone era. However, after more than a century of exposure to the elements, even the sturdiest sash windows often require restoration to reclaim their smooth operation, energy efficiency, and historical charm.
Restoring sliding sash windows in Victorian homes is not just a matter of aesthetics—it’s also about preserving heritage, improving comfort, and potentially increasing property value. According to Historic England, up to 85% of heat loss in period homes occurs through windows and doors, making proper restoration a practical as well as a historical imperative. This detailed guide breaks down the essential steps for successful sash window restoration, highlights common pitfalls, and provides clear comparisons so homeowners can make informed decisions.
.png)
Understanding the Unique Challenges of Victorian Sash Windows
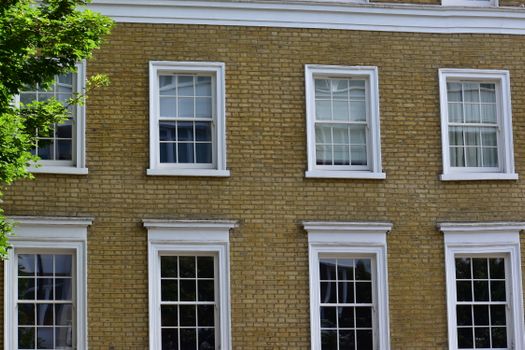
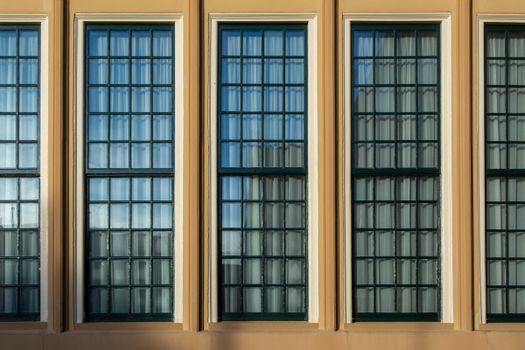
Victorian sash windows, typically dating from 1837-1901, are renowned for their slender glazing bars, high-quality old-growth timber, and distinctive weights-and-pulleys mechanism. Unlike modern windows, these were built to last, but they face unique challenges after 100+ years:
- Wood decay from persistent damp or poor maintenance - Rattling or draughty frames due to shrinking timber and worn seals - Broken sash cords or jammed pulleys - Flaking paint that allows water ingress - Single glazing that provides little insulationA 2023 survey by the UK’s Society for the Protection of Ancient Buildings found that 67% of Victorian sash windows in urban homes showed signs of moderate to severe deterioration, particularly in the lower rails and sills. Proper restoration, rather than replacement, is usually the best approach—preserving both heritage value and environmental credentials.
Essential Assessment: Surveying and Planning Your Restoration
Before any restoration work begins, a thorough assessment is crucial. Many issues are not visible at first glance, and a rushed job can cause more harm than good.
Key steps in the assessment process include:
1. External Inspection: Look for rot, cracked putty, and peeling paint, especially around sills and lower rails. 2. Internal Checks: Test sash movement. Stiff or jammed sashes often indicate broken cords, paint build-up, or warped frames. 3. Glass Condition: Inspect for cracked panes or signs of condensation between panes if secondary glazing was previously installed. 4. Hardware Review: Examine sash lifts, locks, and pulleys for corrosion or missing parts.Documenting the condition with photos and notes helps in planning and sourcing any required materials. For listed Victorian properties, it’s essential to check with local conservation officers before starting—some repairs may require permission to ensure compliance with heritage guidelines.
Step-by-Step Restoration Process for Sash Windows
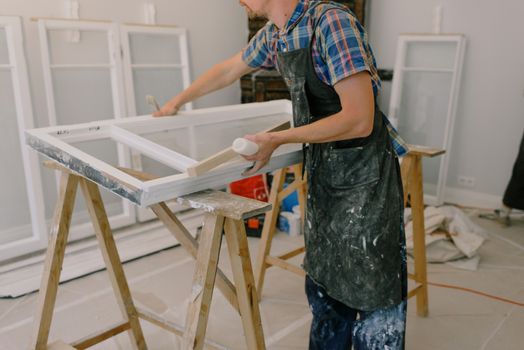
Successful restoration follows a logical sequence, balancing careful dismantling with sensitive repair. Here is a comprehensive breakdown:
1. $1 Both upper and lower sashes are gently prised out after removing stops and parting beads. It’s essential to label each piece for accurate reassembly. 2. $1 Old paint is removed using a combination of chemical strippers (solvent-based or eco-friendly) and gentle scraping. This exposes the timber for inspection and prevents build-up that can jam windows. 3. $1 Softened or rotten sections are cut out and spliced with matching timber, typically slow-grown pine or oak. Modern two-part epoxy resins can also be used for minor repairs but should be used sparingly to retain authenticity. 4. $1 Weights and pulleys are cleaned and lubricated. Broken sash cords are replaced with high-quality waxed cotton or nylon, ensuring the sashes move smoothly. Each sash is reweighted if glazing has changed. 5. $1 Loose or cracked panes are reset or replaced with hand-drawn glass to match the historic look. Linseed oil putty is traditionally used for sealing. 6. $1 Windows are primed and painted with breathable microporous paints, allowing moisture to escape and reducing future decay. Draught-proofing brushes or seals are fitted into the frames, dramatically improving energy performance. 7. $1 The sashes are carefully reinstalled, hardware is refitted, and the window is checked for smooth operation and airtight closure.According to the English Heritage Trust, a well-restored Victorian sash window can last another 60-100 years with routine maintenance, compared to 20-30 years for many modern replacements.
Energy Efficiency and Comfort: Upgrades During Restoration
Victorian sash windows are often criticized for draughts and poor insulation, but restoration offers the perfect opportunity for discreet upgrades:
- $1 Professional draught-proofing can reduce heat loss by up to 86% (Glasgow Caledonian University, 2021). - $1 Installing a slimline secondary pane inside can boost thermal performance to near double-glazing standards and reduce noise by up to 50%. - $1 Where permitted, swapping existing glass for low-emissivity (Low-E) glass further cuts energy costs. - $1 High-quality brush seals around the sashes block out dust and pollen, improving air quality.A landmark study by the Sustainable Traditional Buildings Alliance found that restored and draught-proofed sash windows can achieve U-values (a measure of thermal efficiency) as low as 1.7 W/m²K—better than many modern uPVC windows.
Comparing Restoration, Replacement, and Replica Sash Windows
Many homeowners weigh restoration against outright replacement or new replicas. Here’s how the options compare:
| Factor | Restoration | uPVC Replacement | Timber Replica |
|---|---|---|---|
| Typical Lifespan | 60-100 years | 20-30 years | 50-80 years |
| Heritage Value | Preserved | Lost | Partially retained |
| Cost per Window (UK avg.) | £500-£1,200 | £700-£1,500 | £1,200-£2,500 |
| Planning Permission Needed? | Sometimes (listed buildings) | Usually (in conservation areas) | Sometimes (if altering appearance) |
| Environmental Impact | Low (reuse materials) | High (plastic waste) | Medium (new timber use) |
Restoration is almost always the best choice for Victorian homes, combining longevity, cost-effectiveness, and authenticity.
Common Mistakes to Avoid During Sash Window Restoration
While DIY restoration is possible for skilled homeowners, there are critical errors that can undermine results:
- $1 This can damage delicate mouldings and alter the window’s profile. - $1 Non-breathable paints trap moisture, leading to concealed rot. - $1 Improperly fitted seals can jam windows or be ineffective. - $1 Modern float glass can look out of place; specify cylinder or crown glass for authenticity. - $1 Even after restoration, annual checks and touch-ups are essential.It’s often wise to consult or employ a specialist, especially for listed properties or where significant repairs are required.
Preserving Victorian Heritage: Long-Term Benefits of Window Restoration
The benefits of restoring sliding sash windows in Victorian homes extend well beyond aesthetics:
- $1 Original windows are a key part of a building’s character and may add up to 15% to property value (Historic England, 2022). - $1 Draught-proofed sash windows can cut heating bills by 10-15% in period homes. - $1 Restoration saves an estimated 0.3–0.5 tonnes of CO2 per window compared to replacement. - $1 Modern upgrades, such as brush seals and secondary glazing, create a quieter, warmer home while retaining period charm.Ultimately, successful restoration is an investment in both the past and future—preserving the craftsmanship of Victorian builders while meeting the needs of modern living.