Sash windows, with their graceful lines and classic design, have adorned homes across the UK and beyond for centuries. But as time passes, these beautiful features can suffer from wear, weathering, and neglect. For many homeowners, the idea of restoring original sash windows can be both exciting and intimidating—especially for those new to DIY or property renovation. If you’ve ever wondered what’s involved in sash window restoration or how to approach it as a beginner, this comprehensive guide is for you. We’ll break down the process, look at costs, explore essential tools, and provide clear comparisons so you can confidently start your own restoration journey.
The Enduring Appeal of Sash Windows and Why Restoration Matters
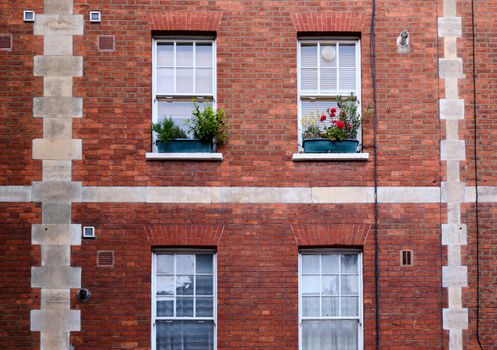
Sash windows first appeared in the late 17th century and became a defining feature of Georgian, Victorian, and Edwardian architecture. Their unique sliding mechanism not only allowed for efficient ventilation but also contributed to the charm and symmetry of period homes. According to Historic England, more than 5 million traditional sash windows are estimated to still exist in the UK—many of which are over 100 years old.
Restoring sash windows, rather than replacing them, preserves the historical and architectural value of your property. It also brings practical benefits: according to a 2023 study by the Society for the Protection of Ancient Buildings (SPAB), restored sash windows with secondary glazing can achieve up to a 60% reduction in heat loss compared to untreated originals. Restoration can also significantly increase the lifespan of your windows, making it a sustainable and cost-effective choice.
.png)
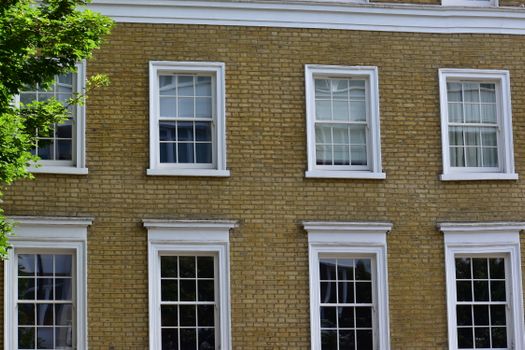
Understanding the Anatomy of a Sash Window
Before beginning any restoration, it’s important to understand the main components of a sash window. Here’s a quick overview:
- Sashes: The movable panels that hold the glass, sliding vertically within the frame. - Box frame: The outer frame that encases the sashes and houses the weights and pulleys. - Weights and cords: Counterbalances attached to the sashes via cords and pulleys, allowing smooth movement. - Staff and parting beads: Wooden strips that hold the sashes in place and enable them to slide. - Glazing: The glass panes, which may be single, double, or secondary glazed.Familiarizing yourself with these parts will make the restoration process clearer and help you identify any areas needing attention.
Step-by-Step Sash Window Restoration Process
Restoring sash windows involves several stages, ranging from basic cleaning to more advanced repairs. Here’s a beginner-friendly step-by-step guide:
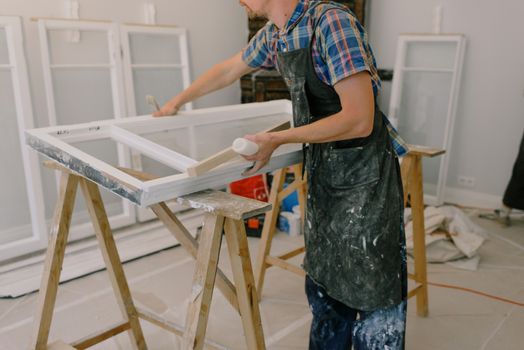
1. Assessment and Preparation Start by examining your windows for signs of rot, peeling paint, broken cords, or cracked glass. Make a list of issues and take photos—these will help you plan your materials and budget. 2. Removing the Sashes Carefully remove the staff beads to free the lower sash, then remove the parting beads to release the upper sash. Label and store beads safely for reinstallation. If weights are still attached, gently untie the cords. 3. Repairing Woodwork Check for rot or damage, especially at the corners and bottom rails. Small areas can be treated with wood hardener and filler. For more serious decay, splicing in new timber is often required. According to the SPAB, up to 70% of timber in original sash windows can be saved with proper repair techniques. 4. Replacing Cords and Pulleys Old or broken sash cords are a common issue. Modern nylon cords are durable and easy to fit. Replace any faulty pulleys to ensure smooth operation. 5. Painting and Finishing Sand all wooden parts to remove old paint and create a smooth surface. Use a high-quality primer followed by exterior-grade paint. Proper painting protects against weather and extends the window’s lifespan. 6. Reassembling the Window Reattach weights, thread new cords, and carefully reinstall the sashes. Replace any worn or missing staff and parting beads. Test the movement—well-restored sashes should move freely and hold their position.Essential Tools and Materials for Beginners
Having the right tools and materials on hand can make sash window restoration much more manageable, especially for those new to the process. Here’s a checklist to get you started:
- Screwdrivers and small pry bar (for bead removal) - Utility knife - Sash cord (nylon or traditional cotton) - Pulleys (if replacement needed) - Wood hardener and two-part epoxy wood filler - Sandpaper (various grades) - Paint scraper - Primer and exterior wood paint - Glazing putty (if re-glazing is needed) - Sash window brushes or draught-proofing stripsInvesting in a few high-quality tools—like a sash removal tool or specialist scraper—can save time and help avoid damage to delicate timber.
Common Issues Faced During Sash Window Restoration
Even with careful preparation, beginners may encounter some typical problems during restoration. Here are three of the most common—and how to resolve them:
1. Stuck or Painted-Shut Sashes Decades of overpainting can glue sashes to the frame. Use a utility knife to gently score along the edges and a sash removal tool to loosen them. 2. Broken Glass or Putty Cracked panes should be replaced with matching glass. Old glazing putty can be softened with a heat gun for easier removal but take care not to overheat and damage the timber. 3. Draughts and Poor Insulation Gaps around the sashes are a leading cause of heat loss. Installing modern draught-proofing strips or brushes can improve energy efficiency by up to 30%, according to the Energy Saving Trust.Cost Comparison: DIY vs. Professional Sash Window Restoration
One of the biggest questions for beginners is whether to tackle restoration themselves or hire a professional. Costs can vary widely depending on the extent of the repairs and the number of windows. Here’s a useful comparison:
| Restoration Option | Average Cost Per Window (2024) | Typical Inclusions | DIY Skill Level |
|---|---|---|---|
| DIY Restoration | £100 - £300 | Materials, tools, draught-proofing | Beginner to Intermediate |
| Professional Restoration | £400 - £900 | Full repair, re-cording, painting, glazing | Not required |
| Complete Replacement | £1,500 - £2,500 | New sash window unit, installation | Not required |
As the table shows, DIY restoration can result in significant savings, especially for those willing to learn and invest the time. However, for properties with extensive damage or listed status, hiring a specialist is often advisable.
Tips for Maintaining Restored Sash Windows
Once restored, regular maintenance is the key to long-lasting sash windows. Here are some practical tips:
- Clean and lubricate pulleys annually to ensure smooth operation. - Check paintwork for chips or cracks and touch up as needed to prevent moisture ingress. - Inspect cords and draught-proofing strips every 2-3 years and replace if worn. - Avoid overpainting the sashes, which can cause them to stick. - Keep the window tracks clear of dust and debris.With these simple steps, properly restored sash windows can last another 50 years or more, maintaining both the beauty and efficiency of your home.
Final Thoughts on Starting Your Sash Window Restoration Journey
Embarking on sash window restoration as a beginner may seem daunting, but with a clear understanding of the process, the right tools, and a little patience, it’s a rewarding and accessible project. Not only does restoration preserve the charm and value of your home, but it also makes a positive impact on energy efficiency and sustainability. Whether you choose to tackle the work yourself or call in the professionals, the result is a stronger connection to your home’s history and a sense of pride in bringing beautiful features back to life.